
I have been riding for over thirty years, and I still see riders make the same mistake: they buy a helmet that fits in the store, then discover on the first long ride that it moves when they hit a bump, or presses hard on their forehead, or lets the wind roar past their ears. A full-face helmet only does its job when it fits. And fitting one properly takes more than pulling it over your head and hoping. This walkthrough is the method I use every time, and I will use the Bell Qualifier as the example because it is a straightforward, honest full-face helmet that fits most heads well when you take the time to do it right.
The Bell Qualifier is a polycarbonate shell full-face helmet with a DOT rating, a clear shield, and a fit that runs close to true to size. It is not the most expensive helmet on the shelf, and it is not trying to be. What it does well is give you a solid, predictable fit if you follow the steps below. I have owned one for years, and I still use the same fitting routine with every helmet I buy, because the routine is what keeps a helmet from becoming a headache at mile 200.
Start with a helmet that fits your head shape, not just your budget
The Bell Qualifier is a great place to start because it fits a wide range of head shapes and it is priced fairly for what it offers. Check today's price on Amazon and see if your size is in stock.
Amazon Check Today's Price on Amazon →Step 1: Measure your head, not your hat size
The first step is the one most people skip, and it is the one that causes the most problems. Get a soft measuring tape, wrap it around your head about an inch above your eyebrows, and keep it level all the way around. That number in centimeters is your starting point. The Bell Qualifier uses standard sizing, so a 57-58 cm measurement usually points to a medium, and 59-60 cm points to a large. But the number is only a starting point, because head shape matters just as much as circumference.
Some heads are round front to back, some are oval, and some are narrow side to side. The Bell Qualifier has a neutral, intermediate oval shape that suits a lot of riders, which is one reason it is so popular. If you have a very round head or a very long oval head, you may need to try a different model. Do not force a helmet that is the wrong shape. A helmet that is too tight in one spot and loose in another will never break in to fit properly, no matter how many miles you put on it.
When you are between sizes, go with the smaller one if it is comfortable for a few minutes, because helmets pack down slightly as the padding compresses. A helmet that feels snug in the store will feel right after a few hundred miles. A helmet that feels loose in the store will feel dangerous on the highway. Last spring I helped a neighbor fit his first full-face helmet before a week of riding over Santiam Pass, and he walked in sure he was a large because that is what he had worn in a half-shell for years. The tape said 58 centimeters, right on the line. The large Bell Qualifier flopped forward when he nodded, and the medium pressed his cheeks the way a new helmet should. He rode that medium for 600 miles that week, and the only thing he complained about was the rain.
Step 2: Put it on correctly, every time
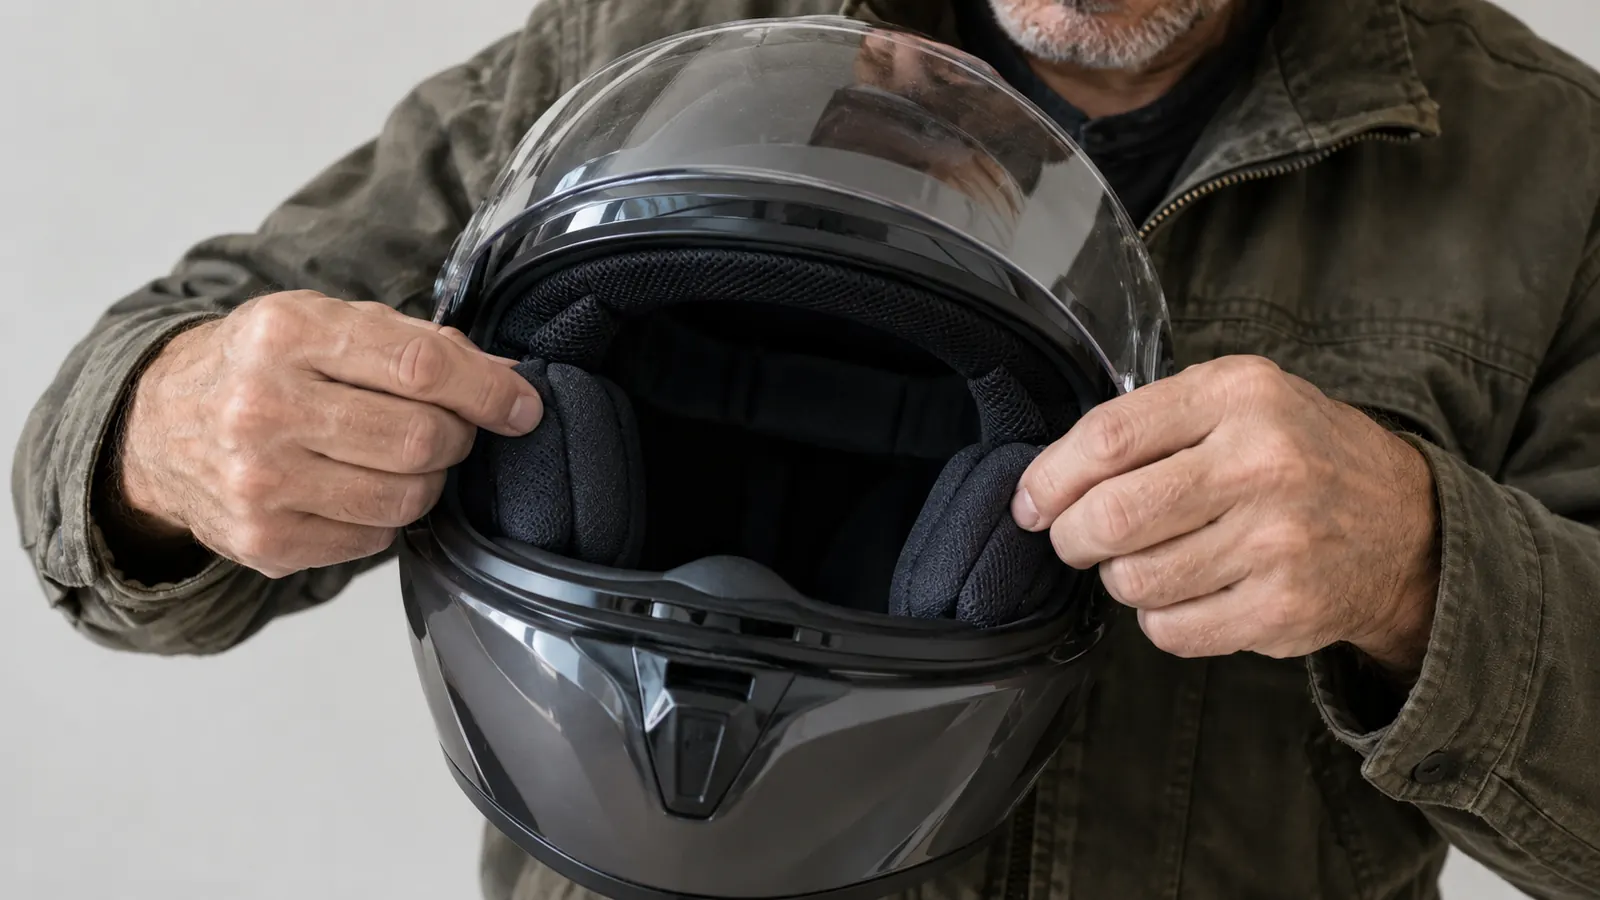
There is a right way to put on a full-face helmet, and it is not the way most people do it. Hold the helmet by the chin bar with both hands, tilt your head forward slightly, and slide the helmet over your head from the front. Pull the chin straps outward as you go so they do not catch under your ears. Once the helmet is on, give it a gentle shake. If it moves around on your head, it is too big. If it feels like it is squeezing your temples after a minute, it is too small or the wrong shape. On the mornings I commute into Bend on Highway 97, I have the Qualifier on in four seconds: chin bar in both hands, head tilted forward, straps pulled wide so they clear my ears. My first full-face helmet took a full minute, and I still pinched an ear every third time. A salesman at a shop in Redmond showed me the trick: pull the cheek pads forward with your fingers as the helmet goes over your ears, so the pads do not fold under your jaw. I have put every helmet on that way since, and it has never failed me.
The Bell Qualifier has a plush liner that feels comfortable right away, but do not let that fool you. The liner will compress a little over time, so the fit you feel on day one is the loosest it will ever be. When I first tried my Bell Qualifier, it felt almost too snug around the cheeks. That is exactly how it should feel. The cheek pads should press against your cheeks firmly, not painfully, and the top of your head should touch the liner without a pressure point.
If the helmet rocks front to back when you move your head, it is too big. If it shifts side to side, it is too wide. A proper fit means the helmet moves with your head, not on your head. You should be able to nod and shake your head and the helmet should stay put.
Step 3: Check the pressure points and the break-in period
Wear the helmet for fifteen minutes in the store or at home before you decide. This is the test that reveals the real fit. A helmet can feel fine for the first two minutes and then start pressing hard on your forehead or your cheekbones. The Bell Qualifier is known for a comfortable, even fit, but every head is different. If you feel a hot spot after fifteen minutes, that spot will only get worse on a long ride.
The break-in period for a new helmet is real, but it is limited. The liner will compress slightly, and the cheek pads will soften, but the shell will not stretch. If a helmet is too tight around the crown, it will stay too tight. If it is too loose at the cheeks, it will stay too loose. The right approach is to buy a helmet that fits correctly from the start, not to hope it will break in to fit. I learned that the hard way on a 400-mile day over the Cascades, riding a helmet I had convinced myself would settle in. By the last hundred miles I had a headache that started right at the crown, and it did not fade until I pulled off the road and took the helmet off. No amount of break-in was going to fix a shell that was simply too small in the top. I sold that helmet that winter and bought the Qualifier, and on the first six-hour day, up to Prineville and back down 97, I never once thought about the helmet on my head.
One thing I tell every new rider: do not buy a helmet that hurts, hoping it will get better. It will get a little better, and then it will be too loose. Buy the one that fits right now, with a little room for the liner to settle.

Step 4: Fasten the chin strap and test the retention
The chin strap is not optional, and it is not just there to keep the helmet from falling off when you set it down. It is the part that keeps the helmet on your head in a crash. The Bell Qualifier uses a standard D-ring closure, which is simple, reliable, and easy to use with gloves on. Thread the strap through both D-rings, pull it snug, and tuck the loose end under the ring so it does not flap in the wind.
The strap should be snug enough that you can feel it against your throat, but not so tight that it is uncomfortable. You should be able to fit one finger between the strap and your chin. Then grab the back of the helmet and try to roll it forward off your head. If it rolls off, the strap is too loose or the helmet is too big. A properly fitted full-face helmet should stay put even when you pull on it.
This is the test that matters most, and it is the one most riders never do. Take the time to do it with every helmet you own. It takes ten seconds and it could be the difference between a helmet that stays on and a helmet that does not. I had an older helmet years ago that I was sure fit, right up until a pothole on a gravel road outside Prineville at about 45 miles an hour shifted it forward enough to block my vision for a second. The strap was tight. The helmet was the problem, and I had never done a roll test on it. I hung that helmet on the peg the next weekend and replaced it. Now the roll test is part of every fit I do, before a helmet earns a place on the shelf in my garage.
Step 5: Do the real-world checks before you ride
Once the helmet fits and the strap is fastened, do the checks that matter on the road. Look up, look down, and look side to side. The top of the eye port should be just above your eyebrows, and you should be able to see the ground in front of you without tilting your head. The Bell Qualifier has a wide eye port, which is one of the things I like about it, but you still need to check that your field of view is clear.
Check the shield. It should close with a positive click and stay closed at speed. The Bell Qualifier's shield has a good seal, and the helmet has vents that you can open and close with gloves on. Make sure the vents are positioned so they do not press on your forehead. Then put on your glasses or sunglasses if you wear them, and make sure they fit under the helmet without pinching. I wear glasses on longer rides, and the Bell Qualifier has enough room in the eye port for most frames.
Finally, do the shake test one more time with the strap fastened. Tilt your head forward, shake it side to side, and make sure the helmet does not shift. If it passes all of these checks, you are ready to ride. If it fails any of them, go back to Step 1 and try a different size or a different helmet. It is worth the extra trip to the store.
What Else Helps
A properly fitted helmet is the most important piece of gear you own, but a few extras make the fit even better. A balaclava or a thin skull cap keeps the liner cleaner and makes the helmet easier to slide on and off. A helmet bag protects the shell when you are not riding. And if you wear earplugs, put them in before you put the helmet on, so the helmet does not push them out of place. I keep a small kit in my saddlebag with a spare shield, a microfiber cloth, and a tube of anti-fog treatment. None of that matters if the helmet does not fit, but all of it makes the miles more comfortable.
A helmet that fits right is the difference between a ride you remember and a ride you forget. The Bell Qualifier fits me like it was made for my head, and that is the whole point.
Get the fit right, then get the miles in
The Bell Qualifier is a solid, honest full-face helmet that fits a wide range of head shapes. Check today's price on Amazon and see if your size is in stock.
Amazon Check Today's Price on Amazon →